It’s been a long time since I first tried to convert pictures into drawings, or more precisely, since I first tried to define a procedure that allows the simulation of a charcoal, pencil, blood drawing from a picture.
The majority of the online tutorials use automatic Photoshop filters, that I personally consider awful, both artistic, stylization and border identification ones. Images always seem a little bit artificial, the artistic technique they refer in reality are really different, you always notice it’s a filtered picture and not a real drawing and all of those images are extremely similar to each others. It is recommended to work with your own two hands, more than entrust an automatic system.
The best tutorial I found online that I tested, based on this presupposition, is Photo to Pencil Sketch written by Tim Shelbourne (on his web site many other free tutorials are available) and published on Photoshop Photo Effects Cookbook.

The most difficult part of this tutorial is that you have to be a little bit painter to draw some pencil marks in a pleasing way or you suddenly notice that the creator could barely keep a pen in its hand. Moreover, it is practically necessary to have a graphics tablet, because a mouse doesn’t allow a correct drawing. I made attempts for some time and I finally found a rewarding way to remedy those problems. Besides, I found some little expedients that are not reported into the original article. I will guide you through the tutorial above mentioned with a series of personal reflections that will lead you to better results.
Picture preparation

First of all, you have to choose the right image. Drawings and pictures works in a deeply different manner. Pictures have sweet tonal transitions, rich details, closed shadows and burned lights are usually not aesthetic. Pencil drawings must build blacks with marks, with discontinuous lines; grey scale is due to density relative to black and white lines. Moreover, drawings are less detailed: blocking, matters, surfaces are part of the paint; drawing is focused on edges, shapes, marks. Understanding all those rough differences is fundamental to obtain a good result.
Therefore, graphical images are the most adapted ones, which would work even with white, black and grey scales only. Poor and high-contrasted picture. Images where little details are not important, but where white and black volumes are indispensable. To make the image ready, it is advisable to considerably augment the contrast, to separate shadows from lights. A global augmentation of the general contrast is not sufficient and appropriate. Try to manually select parts of the picture, substantially augment or reduce brightness. Whiten, blacken, augment the local contrast, zone per zone. During this phase, you already need to have your goal clear and a little bit of practice is required.

Don’t be scared to force your hand. You can start from an excessively contrasted pictures, with some completely black shadows and a completely white face, where lips and eyes protrude with decision. It is not necessary to work with lot of precision, masks can be rude, selections can be not so precise, parts of the picture can be white or black.
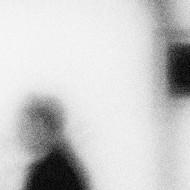
There’s no problem even in using an out-of-focus image or a blur one. Actually, a photo you’d usually throw away is acceptable, as a soft photo can give wonderful results with this technique. so, if you have images with technical errors that you’d throw away with particular sadness, you can try this solution. A bad picture can be the base for a splendid drawing.
Preparing the drawing

Tim Shelburne’s tutorial begins creating a base that simulate drawing paper. Once opened and desaturated the image, create a new light-grey fill layer that will be the color of the paper you will use to draw on. Then, let’s go back to New fill layer -> Pattern again. In the second dialogue window, clicking on the arrow next to the icon, open the pattern menu. Clicking on the arrow again, select Greyscale papers. Tim Shelburne suggest the use of Fibers 1 and a Pattern Scale of 340%, to set the layer in Soft Light and 35% of opacity. This is obviously only one of the possibilities. The scale value depend on the image dimension; if it’s big, it is necessary an elevated value. In any case, remember this is a phase that only create a textured surface that seems a drawing paper, so you have to experiment with different patterns, different values, such as opacity and blending mode of the layer itself.

The second step of our tutorial make us building a trace that helps us drawings and that can be used to define the edges of the image. Duplicate the background and put it over all the other layers. To create borders, Tim Shelburne suggests to use the filter “Stylize -> Glowing Edges” with the following values: Edge Width 3, Edge Brightness 11, Smoothness 10; these values are not fundamental for the final image, even because often this layer only helps in the initial phase of the drawing and can be eliminated. Once the filter is applied, the layer must be inverted, to turn it into positive, put it in Multiply as fusion option and about 15% of opacity.

Our last stage before start drawing is the creation of another background copy, positioned over all the other layers. Let’s apply a little bit of noise, for example with an intensity of 10, to partially brake the the file and have a less photographic image. Select Darken as fusion option and add a black level mask. Drawing in white on this mask, you reveal the image underneath, the prepared trace allow you to choose where to draw. Cross sharp marks to simulate a hard pencil, use soft brushes to obtain the effect of a drawing faded with fingers. Keep the drawing marks separated from each others on the mask to obtain a pencil or pen drawing, mix them both to obtain a charcoal drawing.
The drawing
In his tutorial Tim Shelburne suggest to use a brush from the Dry Media Brushes set. I personally found this solution difficult, most of all for those who doesn’t use a graphics tablet and are not used to draw. I found a quick, practical alternative that achieve, in my opinion, more convincing result.

The idea is to find a way to produce defined and precise marks, quickly and more or less automatically, using a brush originally created to scratch (free download at Scratch Grunge Photoshop Brushes), obtained exactly the desired effect. Once installed the set, it is available a 572 pixel preset, with a long and thin shape, perfect to simulate the mark of a pen or pencil.
This brush, when used directly, forms parallel and regular lines that suddenly demonstrate the digital nature of the image. Anyway, using brush options it is possible to effectively solve this problem. Press F5 to open the brushes palette. Brush Tip Shape window allow you to modify the inclination of the mark, for example if you have a preferred drawing direction you want to follow or if you want to modify the space between two marks that I suggest to keep large. In the Shape Dynamics window, modifying Size Jitter and Minimum Diameter controls, you can produce a series of marks with random inclinations, perfect to darken large blocking of the image. Use the Scatter window to offset the initial and ending part of all the marks. It is obviously possible to create presets, to quickly jump from a combination of options to another.

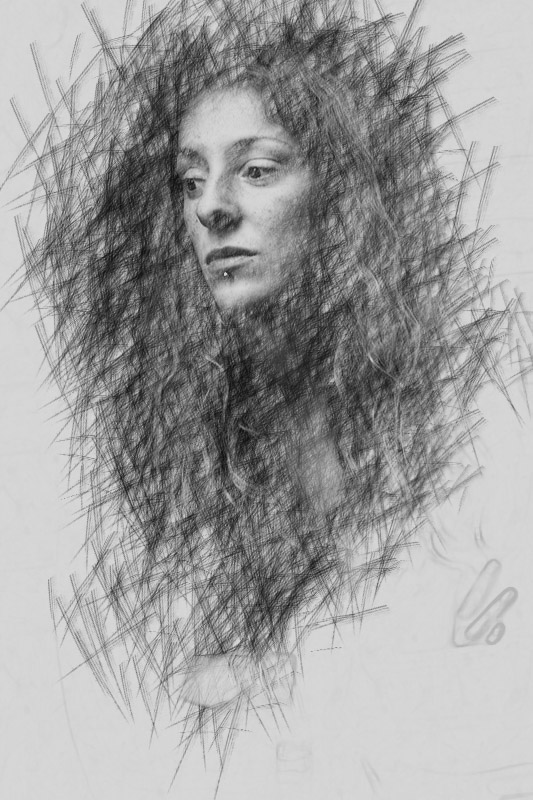
Using these options, it’s easy to mark a huge part of the image. As you build your drawing, it is important to insist on those parts you want to darken, for example not passing the brush on the bright parts, such as the skin. If you exaggerate with all these passages that reveal the photo underneath, you loose the effect of the desired pencil or pen drawing. Insisting on all the dark parts, the effect is extremely convincing. I suggest to mix the random direction of the mark with unidirectional passages, in order to create a certain coherence, a preferred direction for the drawing. It can be useful to add hand marks, with brushes such as Dry Media ones: in this case the effect is more similar to charcoal drawings than pen or pencil ones.
As your drawing take form, it is better to start interpret the image, leaving some zones clearer and darken others, creating some zones with a littler density of mark or leaving some zones totally uncompleted. Consciously select where to apply marks is fundamental for a good result of the drawing.
Drawing finishes

At a certain point, it is impossible to keep on applying the cross-hatching, otherwise the noisy photo is completely revealed. Usually this is the point where I want to modify the image again, in a creative manner, re-invent the matter in front of me. From the moment where you start transforming a photo into a drawing, you must be brave and be ready to draw for real.
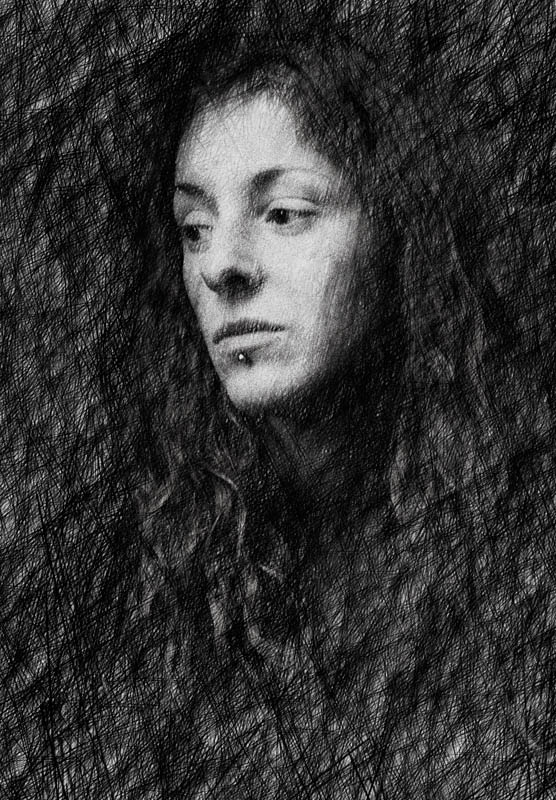
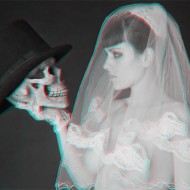
As free hand drawing can be difficult, press Ctrl+Shift+Alt+E to copy a snapshot of your pictures into a new layer. Reduce the opacity of the brush and add hand made cross-hatching where you want to adjust the image, such as shadows to cover elements you didn’t want, for example in the background, or to give some more substance in the high lights. This is absolutely the most difficult part, but even the most funny. The image in the article shows a fine cross-hatching on the face, in a way to recover details but cover background, hands, hair as the face emerge from the black of the drawing.

Once you reached this point, I suggest to duplicate your image once again, with Ctrl+Shift+Alt+E, and put it in Multiply fusion modality. This option darken the image, sometime even too much, but it can be useful to give strength to your drawing. This leads you to deep black as in the original image an effect otherwise impossible. In fact to have achieve this goal, you should scratch the entire mask, but this way you would reveal the picture underneath. To maintain a sort of drawing effect, leave some white spaces between the marks, that enlighten the image. Adding this layer deepens the black color, conserving the cross-hatching effect. Let’s pretend that the layer gives an effect similar to pen or charcoal drawings, while our drawing looks like an hard pencil one. Modifying the layer opacity brings to the desired effect and the right compromise between intensity and tonal gamma of the image. Now, I suggest to slightly regulate contrast and brightness, with a simple adjustment curve.
Your drawing is now ready. It is possible anyway to play around with some effects again. There are infinite way to colour monochromatic images, so you just have to choose the one you prefer.
Conclusions
The illustrated tutorial allows a quick and efficacious transformation of a photography into a pen or pencil drawing. Moreover, it is possible to find a CS3 Photoshop action, pencil drawing, that automatize the majority of the work detailed in this article.


“It is recommended to work with your own two hands, more than entrust an automatic system.”
What, like with a camera? 🙂
This drawing tutorial is about a semi-automated technique. Sure you have to use a camera and Photoshop, but it is better to avoid completely automatic tools, they always look fake…
You can also subscribe to this post comments RSS feed.